🌞 My Aloe Vera Scare Story
Aloe vera has always been one of my favorite plants — low maintenance, pretty, and full of benefits. I thought it was impossible to kill one… until I almost did.
When I had to revive my aloe vera plant, I realized how even the easiest plants can struggle if we don’t understand their needs. What started as a few soft leaves soon turned into a full-blown rescue mission — and here’s how I brought it back to life in just three days.
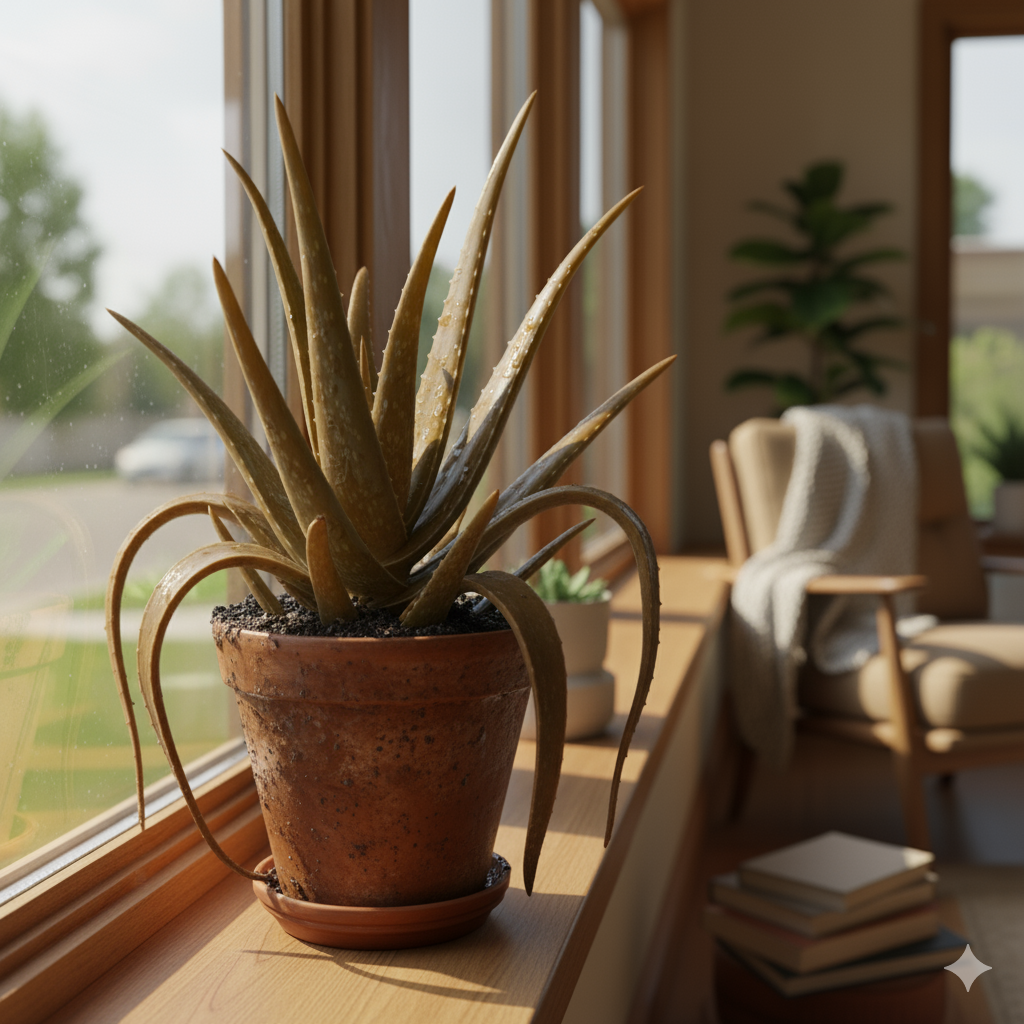
It all started when I noticed the leaves turning mushy and flat, instead of plump and green. Some even started browning at the base. I couldn’t understand why — after all, I was watering it regularly and keeping it in full sunlight.
Turns out, those were exactly my mistakes.
🚨 What Went Wrong
After some digging (and mild panic), I realized I had made two classic aloe vera care mistakes:
- Overwatering:
Aloe doesn’t like wet feet. I was watering every 2–3 days, not realizing that the roots were sitting in soggy soil. - Too Much Direct Sunlight:
I kept it in harsh afternoon sunlight, which burned the delicate leaves — especially since the plant was already weak from excess water.
💧 Step 1: Emergency Rescue — Drain and Dry
The first thing I did was remove the plant from its pot. The soil was heavy and smelled slightly sour — a clear sign of root rot.
I trimmed off the mushy roots and damaged leaves with a clean pair of scissors. Then I let the plant rest on a tray for 24 hours to dry naturally.
This “drying time” helps prevent fungus and gives the healthy roots a fresh start.
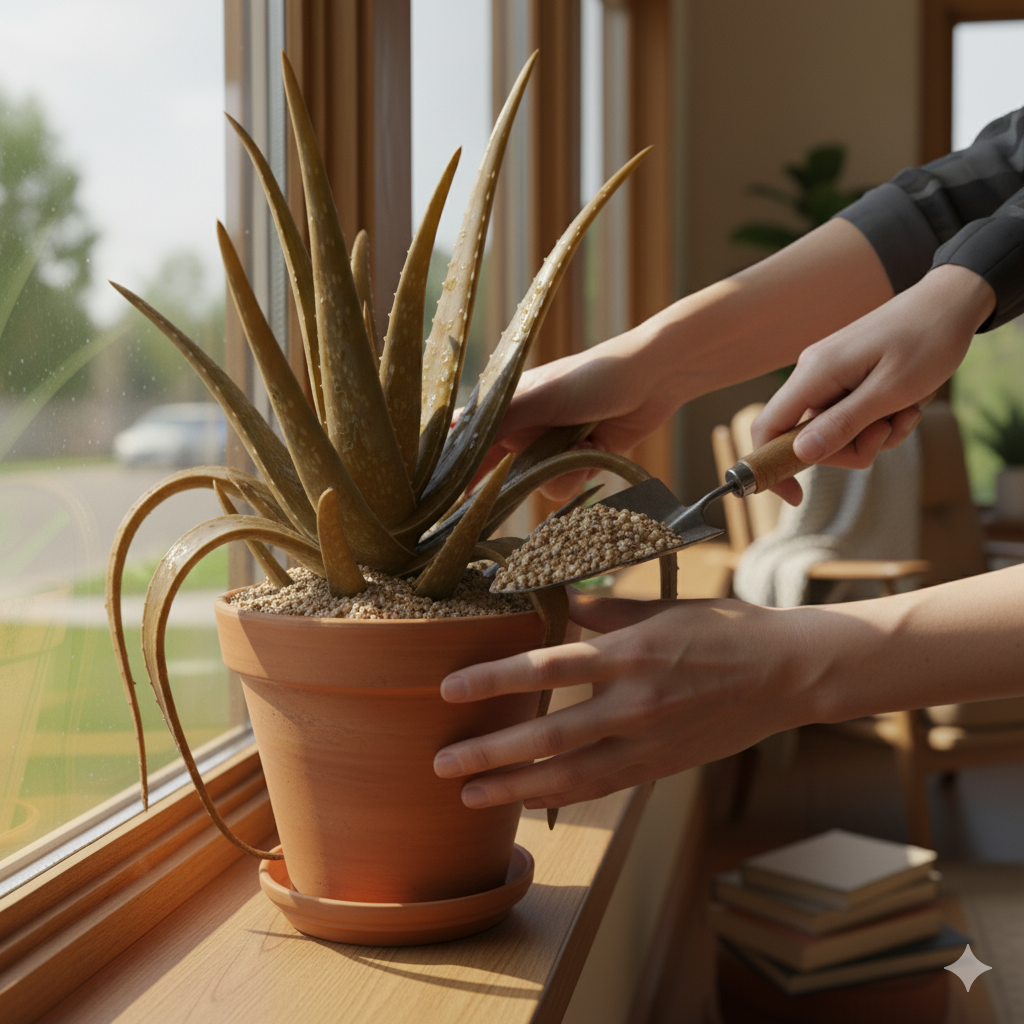
🌿 Step 2: Fresh Start in the Right Soil
Next, I repotted my aloe vera using:
- 50% cactus mix
- 25% perlite
- 25% sand
This combination keeps the soil airy and fast-draining — exactly what aloe loves.
I placed a small pebble layer at the bottom for extra drainage and used a clay pot instead of plastic.
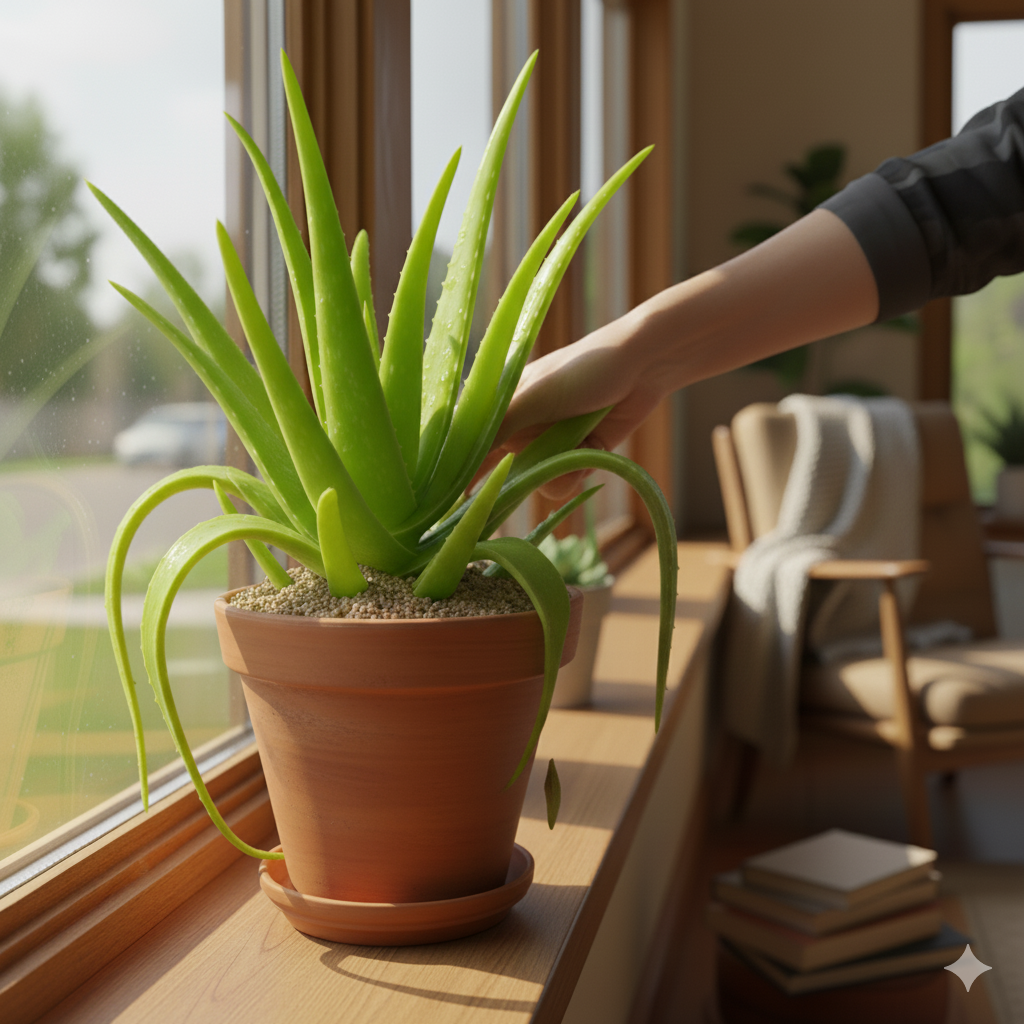
🌤️ Step 3: Gentle Light, Not Full Sun
Instead of putting it right back under the blazing sun, I kept it in bright indirect light near a window.
This helped the plant recover without getting scorched.
After 3 days, the remaining leaves started firming up, and within 2 weeks, I noticed new baby leaves emerging from the center. That’s when I knew — my aloe vera was officially back!
🧠 Lessons I Learned
- Less water = happier aloe
Water only when the top 2 inches of soil are completely dry. In winter, once every 2–3 weeks is enough. - Bright but indirect light
Aloe loves sunlight, but not the harsh afternoon rays. - Well-draining soil is everything
Regular potting soil is too dense — mix in sand or perlite. - Avoid misting
Aloe doesn’t like humidity on its leaves; it can cause fungal spots.
🌺 The Reward — New Growth!
Now, my aloe is thriving again — with new green pups (baby aloe plants) growing around the base. I’ve even gifted a few to friends as “survivor plants.”
Saving it taught me patience, observation, and how a little attention can bring a dying plant back to life.
💚 Final Thought
If your aloe vera looks sad, don’t give up on it just yet. With the right soil, light, and watering rhythm, it will bounce back — just like mine did.
Sometimes, even the easiest plants can teach us the best lessons in care. 🌱